Go to the Shopify App Store and search for Swift Stock. Click Install.
2
Approve the app permissions when prompted by Shopify.
3
You will be redirected to the Pricing Plans page. Approve the 14-day free trial ($20/month after trial).
4
Once approved, the app opens automatically inside your Shopify admin dashboard.
Note: The app requires an active subscription. Trial days are tracked by Shopify and do NOT reset if you uninstall and reinstall.
First Login
When you first open the app, the store owner should go to Manage Users to create user accounts, then go to Settings and enable User Authentication.
1
Enter your Username and Password provided by your admin.
2
Click Log In. You will be taken to the Dashboard.
Important: Sessions expire after 8 hours. You must re-enter credentials on each new device/browser or after expiry.
Forgot Username or Password?
On the login screen, click "Forgot Username and Password". The system sends a recovery email with your username and a temporary password to the admin email configured in Settings.
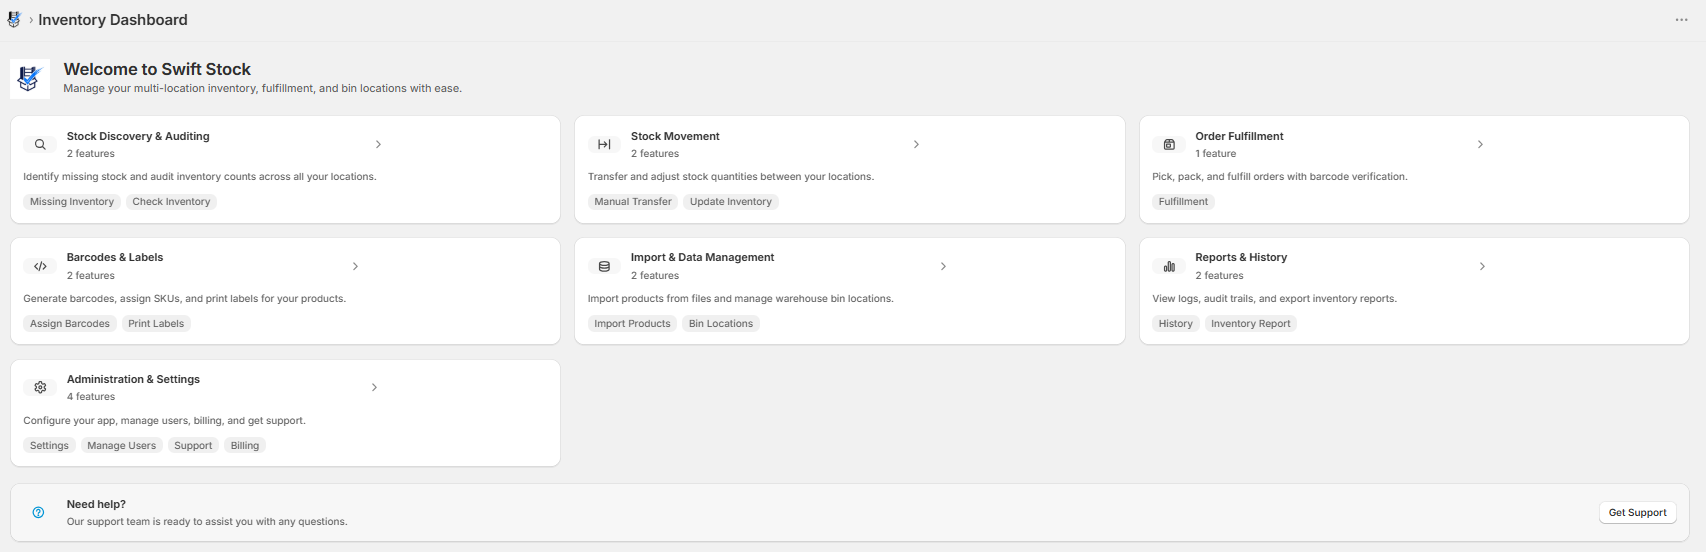
2. Dashboard Overview
The dashboard organizes all features into 7 intuitive groups. Click any group card to expand it and see the features inside.
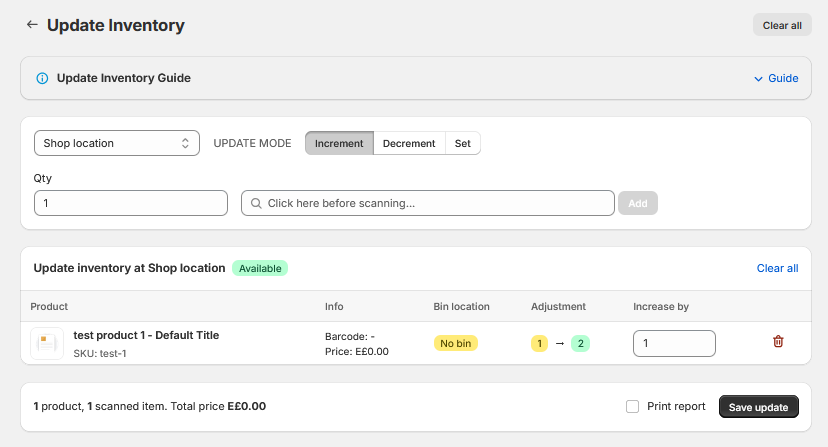
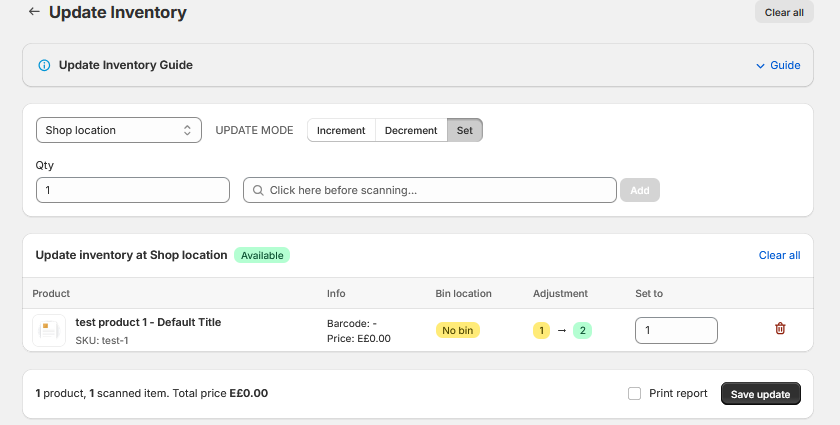
Set Mode - Set stock to an exact number (e.g., full recount)
Step 2: Scan and Save
2
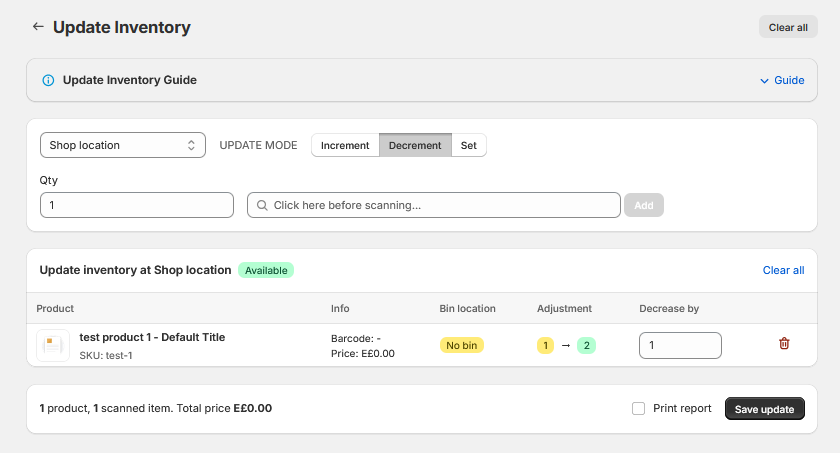
Set the Qty field for batch scanning (e.g., 5 to add 5 per scan). Scan barcodes or search products.
3
Adjust quantities individually if needed. Optionally check Print report.
4
Click Save update to apply all changes at once.
Tip: The "Available" badge confirms you are working with available inventory (not committed or incoming stock).
🎬 Video Guide: Update Inventory
5. Order Fulfillment
Process Shopify orders by scanning items and completing transfers.
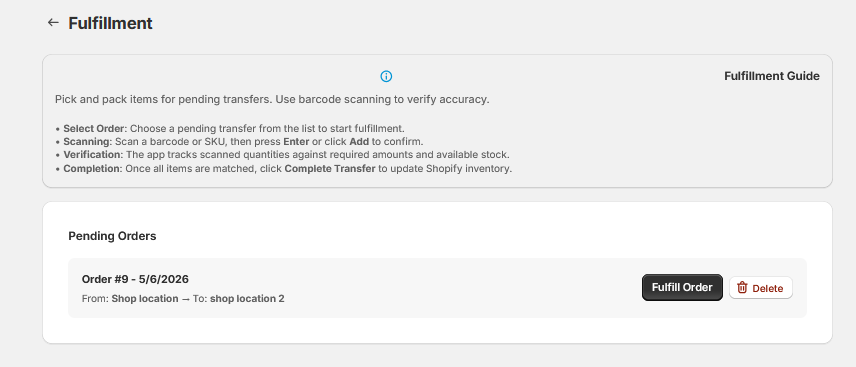
Step 1: Select an Order
1
Open Fulfillment to see pending orders with Order Number, Destination, Items, Total Qty, and Status.
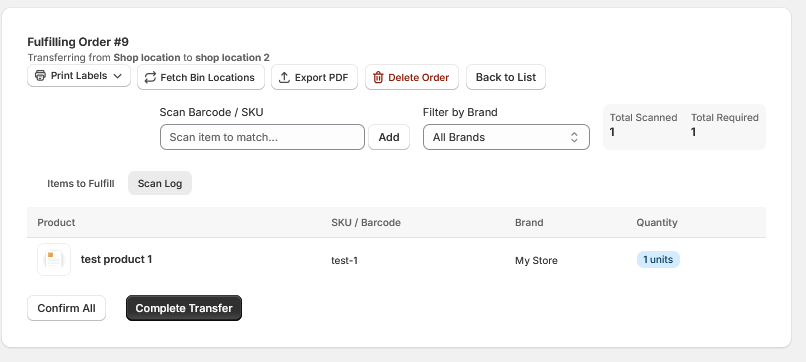
Step 2: Scan Items
2
Click an order. Scan each item's barcode. Watch Total Scanned vs Total Required counters.
3
Use Filter by Brand to focus on specific vendors. Switch to Scan Log tab for scan history.
Step 3: Complete
4
Click Confirm All to mark items as picked, then Complete Transfer to finalize.
Order Actions Toolbar
Button
Action
Print Labels
Print barcode labels for scanned or all items
Fetch Bin Locations
Load bin locations for faster picking
Export PDF
Download printable order summary
Delete Order
Remove from queue (does not cancel Shopify order)
Note: Enable "Prompt to print labels after fulfillment" in Settings for automatic label printing prompts.
🎬 Video Guide: Order Fulfillment
6.1 Assign Barcodes / SKUs
Generate and assign barcodes or SKUs to products that don't have them.
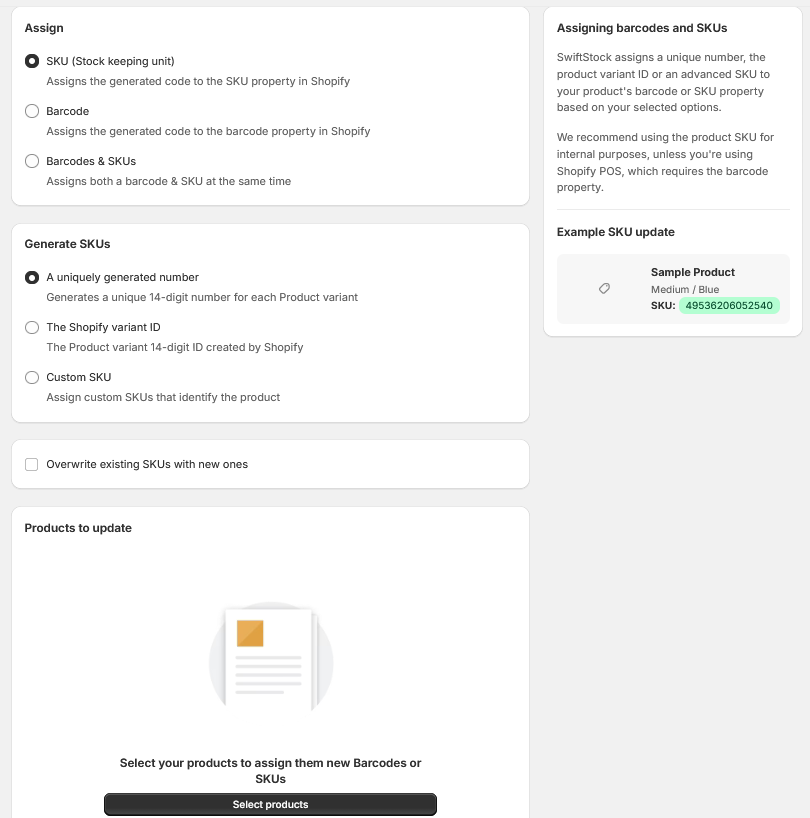
What to Assign
Option
Description
SKU
Assigns to SKU property. Recommended for internal use.
Barcode
Assigns to barcode property. Required for Shopify POS.
Both
Assigns barcode and SKU simultaneously.
Generation Methods
Method
Description
Unique number
Generates a unique 14-digit number per variant.
Shopify variant ID
Uses the variant's internal Shopify ID.
Custom SKU
Define your own custom format.
How to Use
1
Select what to assign (SKU/Barcode/Both) and the generation method.
2
Optionally check "Overwrite existing SKUs" to replace existing values.
3
Click Select products, choose products, then confirm.
Important: If "Overwrite" is unchecked, products with existing SKU/barcode are skipped.
🎬 Video Guide: Assign Barcodes
6.2 Print Barcode Labels
Design and print customizable barcode labels.
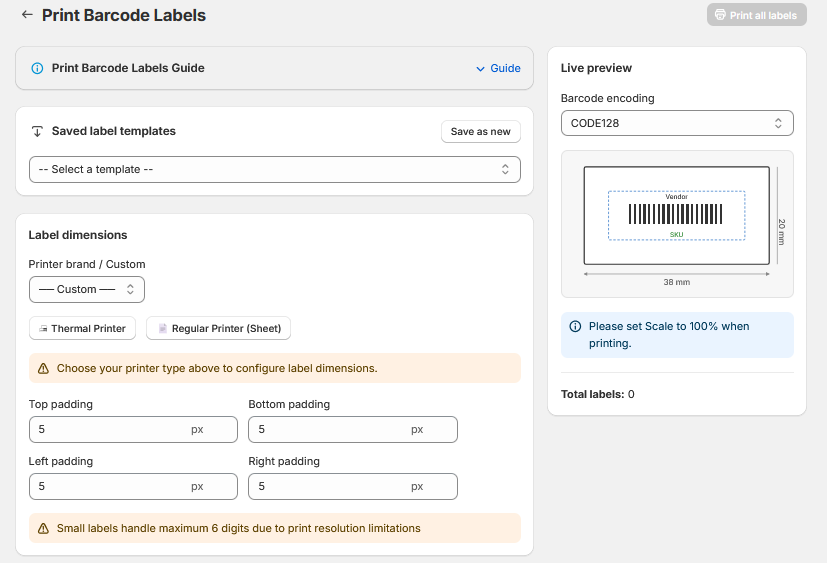
Configuration Options
Saved Templates - Save/load frequently used label configurations.
Printer Type - Choose Thermal Printer (continuous rolls) or Regular Printer (sheet paper).
Label Dimensions - Select a printer brand or set custom padding (top, bottom, left, right in px).
Barcode Encoding - Default is CODE128 (most compatible). The Live preview updates in real time.
How to Print
1
Configure settings or select a saved template.
2
Select products. Review Total labels count on the right.
3
Click Print all labels (top-right green button).
Note: Small labels handle max 6 digits. Always set browser print Scale to 100% for accurate sizing.
🎬 Video Guide: Print Labels
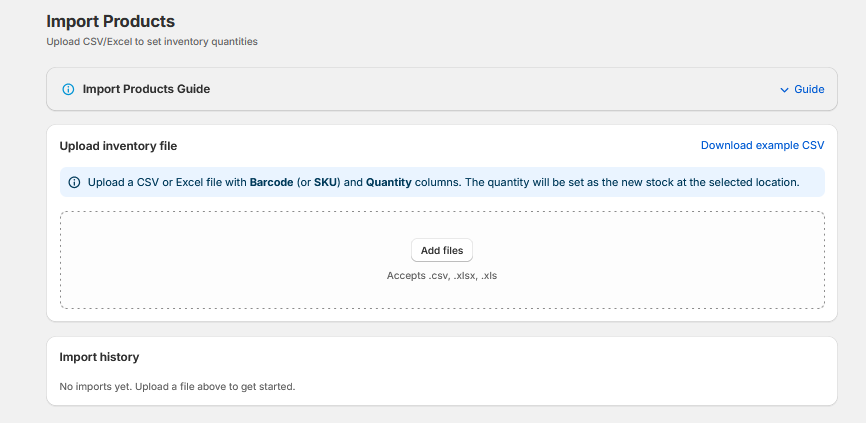
7.1 Import Products
Bulk import inventory quantities from CSV or Excel files.
Step-by-Step
1
Prepare a file with Barcode (or SKU) and Quantity columns. Click Download example CSV for a template.
2
Click Add files or drag-and-drop. Accepted: .csv, .xlsx, .xls
3
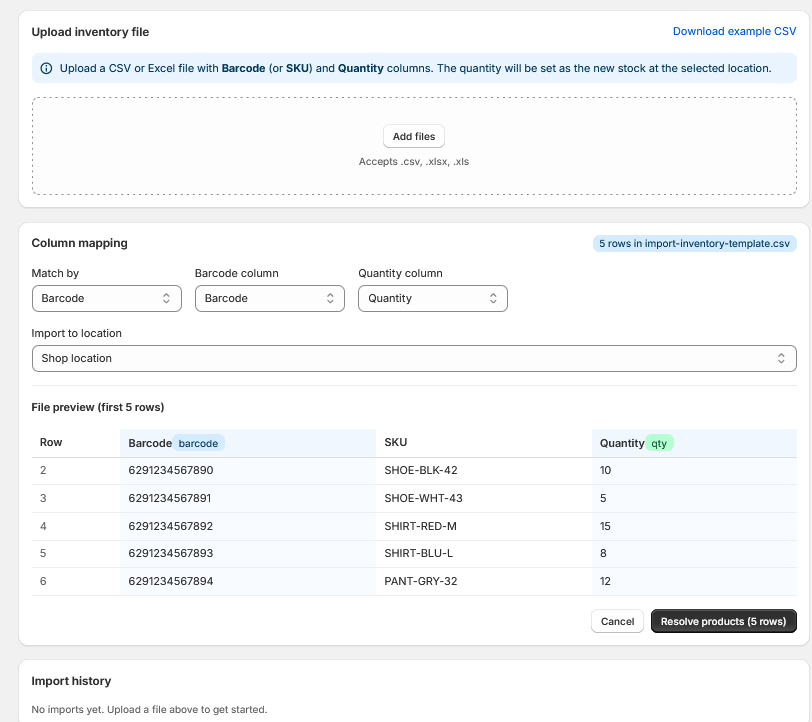
Configure Column mapping: Match by (Barcode/SKU), select columns, choose target location.
4
Review the File preview (first 5 rows), then click Resolve products to match against your catalog.
5
Review matched products and confirm the import.
Important: Imported quantity SETS the new stock (does not add to existing). Double-check before importing.
Tip: The Import history section at the bottom logs all previous imports for audit.
🎬 Video Guide: Import Products
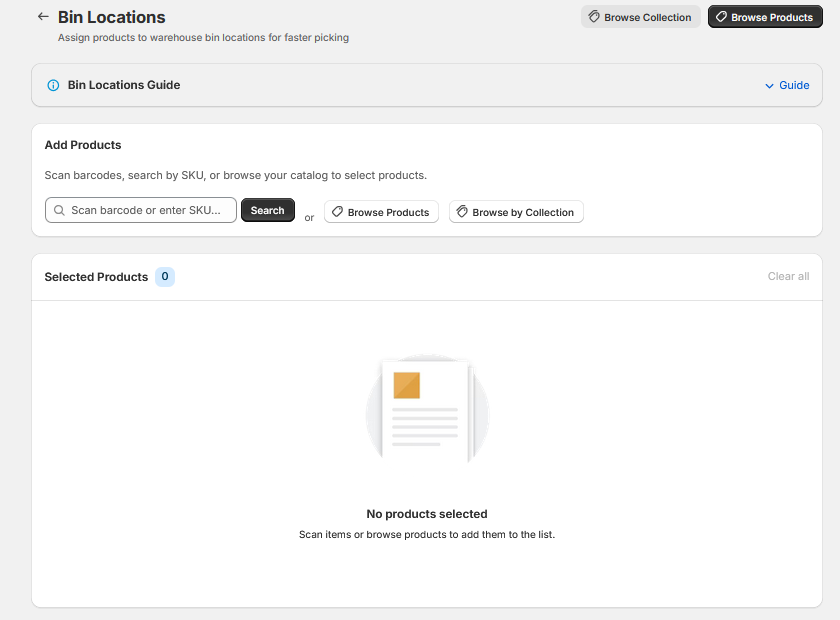
7.2 Bin Locations
Assign warehouse shelf/bin codes to products for faster picking.
How to Set Bin Locations
1
Add products by scanning, searching by SKU, or using Browse Products / Browse by Collection.
2
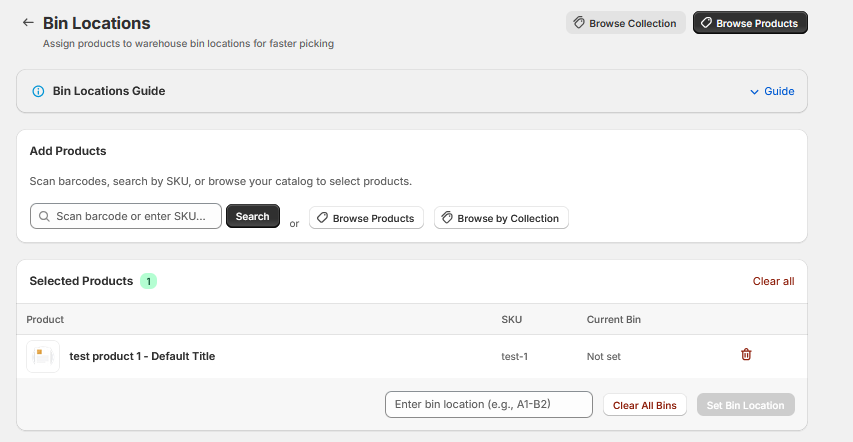
Type the bin code (e.g., A1-B2) in the "Enter bin location" field.
3
Click Set Bin Location to assign to all selected products. Use Clear All Bins to remove.
Note: Bin locations are stored as Shopify metafields. Configure which metafield to use in Settings. Variant metafields allow different bins per size/color; product metafields store one bin per product.
🎬 Video Guide: Bin Locations
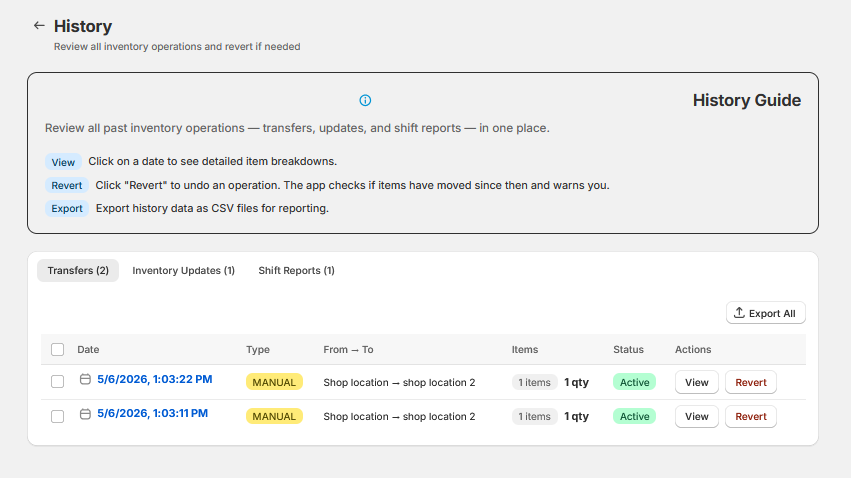
8.1 History
Single audit log for all inventory operations: transfers, updates, and shift reports.
History Tabs
Tab
Shows
Transfers
All manual transfers. Date, type, origin/destination, items, qty, status, actions.
Inventory Updates
All increment, decrement, and set operations from Update Inventory.
Shift Reports
Completed shifts with all transfers grouped per shift session.
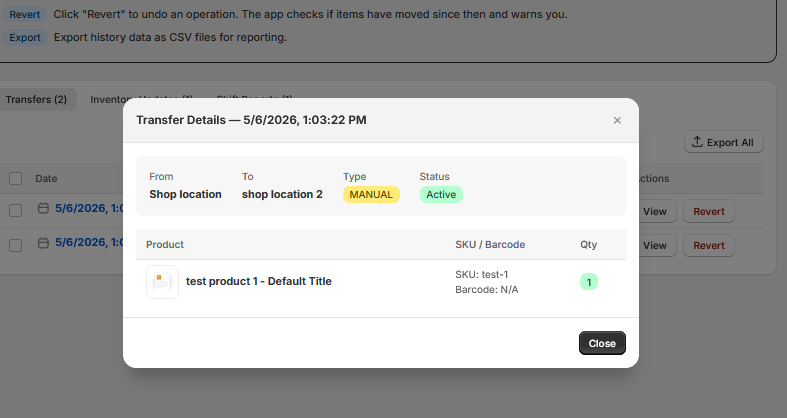
Viewing Details
Click View on any row to see every product, SKU/barcode, and quantity involved.
Actions
Revert - Undo a transfer/update. The app warns about potential conflicts.
Export All - Download entire history as CSV for reporting or compliance.
Use checkboxes to select specific rows for batch export.
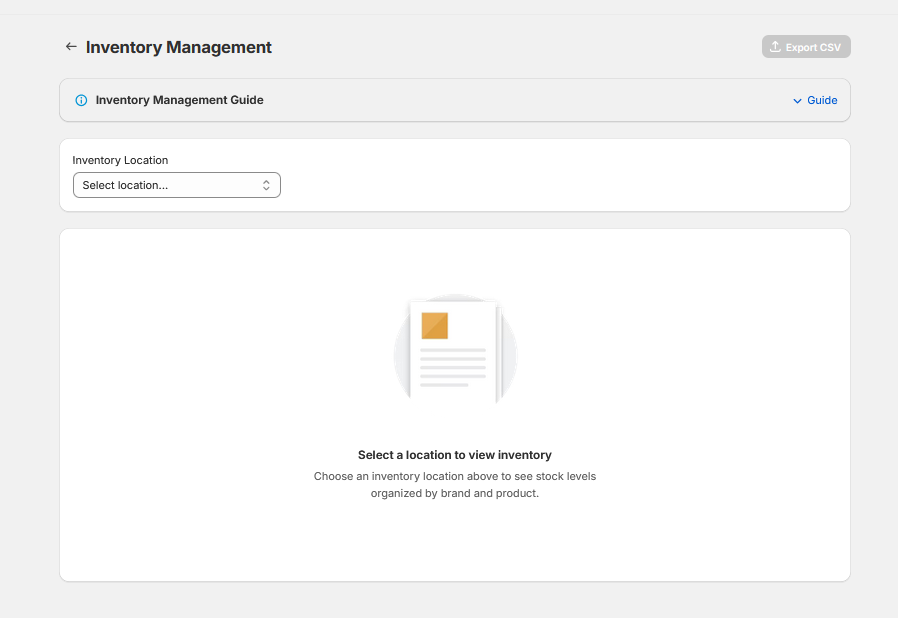
8.2 Inventory Report
Hierarchical report of all inventory at a location, grouped by brand and product.
How to Use
1
Select an Inventory Location from the dropdown.
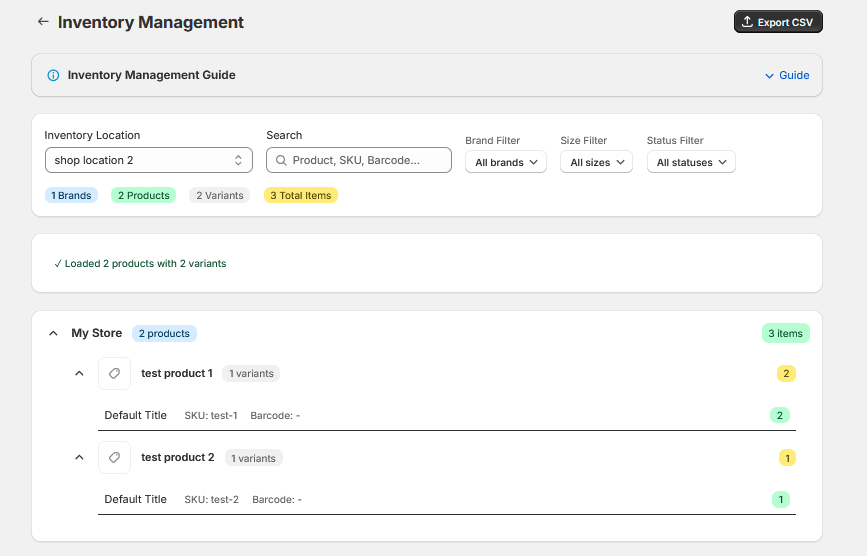
2
Products load in a collapsible tree: Brand > Product > Variant, each with stock count.
Features
Summary badges: Brands, Products, Variants, Total Items.
Click expand/collapse arrows to drill into brands or products.
Filter by Brand, Size, or Status. Search by name, SKU, or barcode.
Click Export CSV to download the full report.
Tip: Use weekly for management review and purchasing decisions.
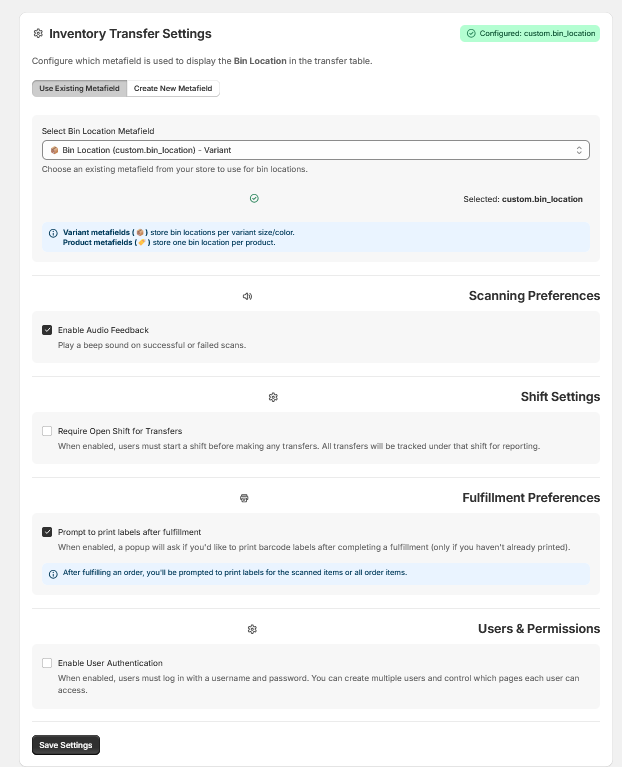
9.1 Settings
Configure app behavior across all features. Click Save Settings after changes.
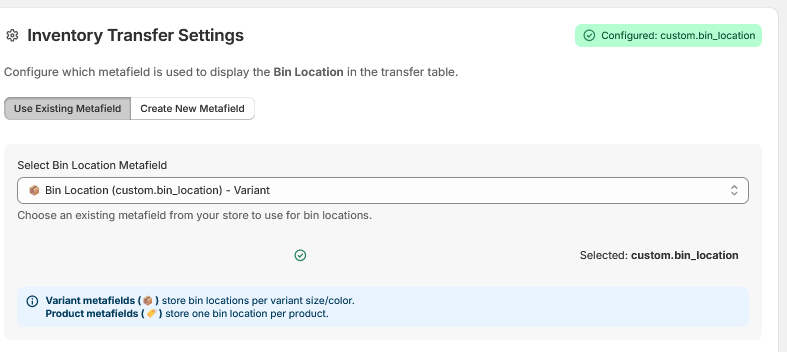
Bin Location Metafield Configuration
Type
Behavior
Variant metafield (orange dot)
Stores bin per variant (size/color). Use when different sizes are in different bins.
Product metafield (green dot)
One bin per product. Use when all variants share a bin.
Tabs: Use Existing Metafield (select from store) or Create New Metafield (app creates one).
All Settings
Setting
What it does
Enable Audio Feedback
Beep on successful/failed scans for hands-free warehouse work.
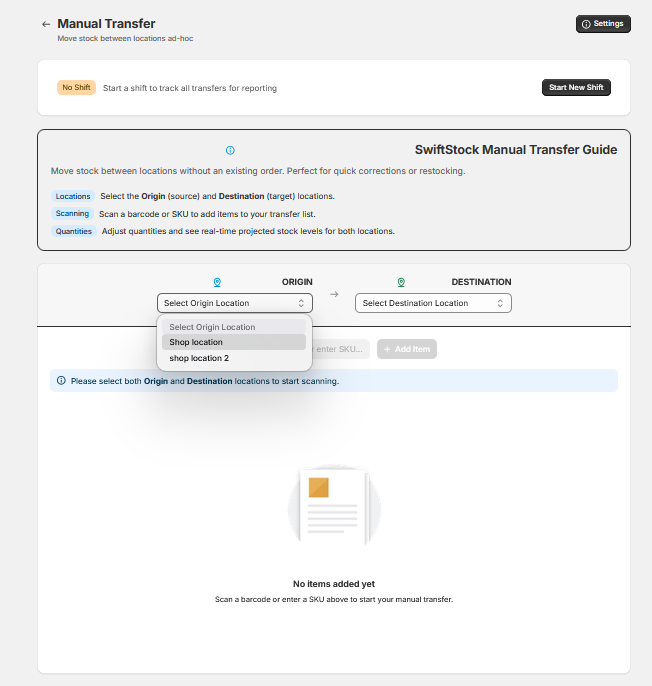
Require Open Shift
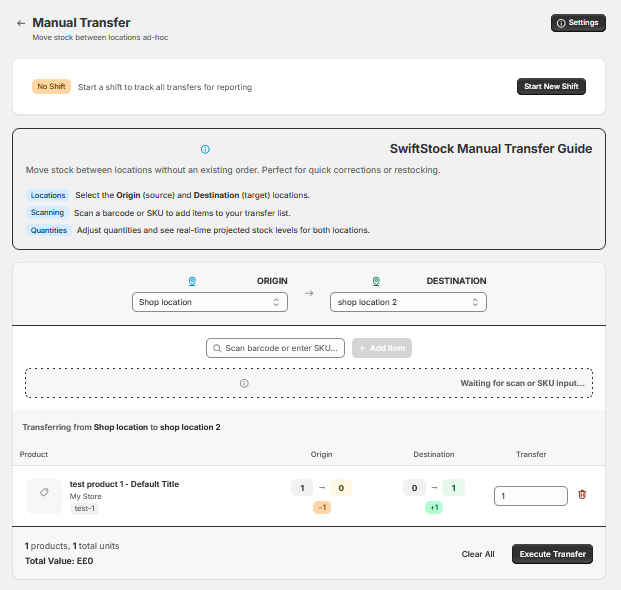
Users must start a shift before transfers. See Manual Transfer.
Print labels after fulfillment
Auto-prompt to print labels after completing an order. See Fulfillment.
Enable User Authentication
Require login. Create users in Manage Users first.
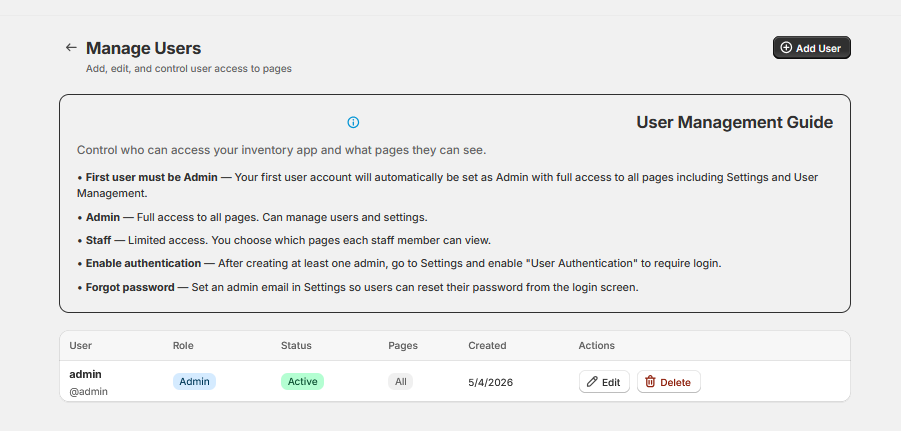
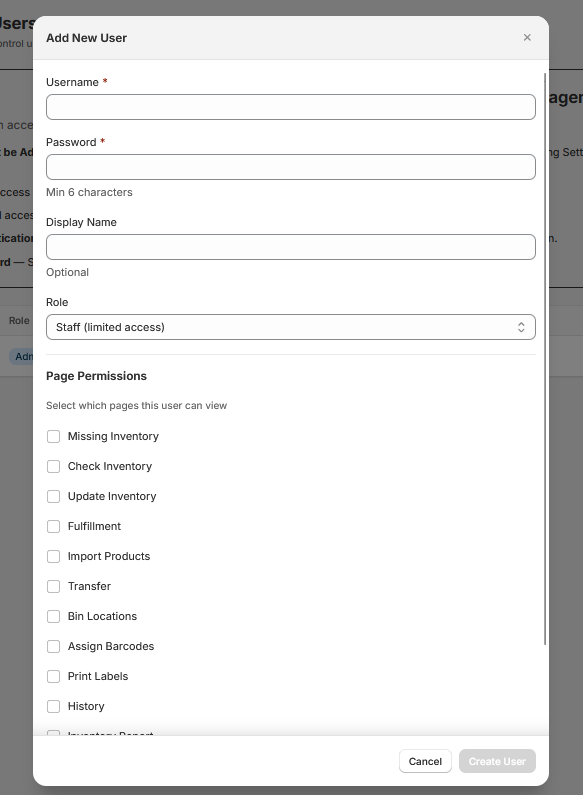
9.2 Manage Users
Control who can access the app and which pages each user sees.
User Roles
Role
Access
Admin
Full access to all pages including Settings and User Management.
Staff
Limited. Admin selects which pages each staff member can view.