SwiftPOS: The Complete A-Z Guide
Welcome to the ultimate step-by-step guide for SwiftPOS. Whether you're setting up for the first time or training your staff, this guide covers everything from installation to advanced settings.
1. Installation & Initial Setup
Before making your first sale, you need to properly set up SwiftPOS within your Shopify admin.
- Install the App: Install SwiftPOS from the Shopify App Store.
- Create a Virtual Store: Upon first launch, go to the Settings tab and create a Virtual Store.
- Assign a Location: Link your virtual store to one of your physical Shopify Locations. This ensures inventory is deducted from the correct place.
- Select a Pricing Plan: Choose the Free, Growth, Pro, or Enterprise plan depending on your feature needs (e.g., shifts, multiple locations).
2. The Main Dashboard
When you open SwiftPOS, the Main Dashboard provides a quick overview of your store's status and quick access to all modules.
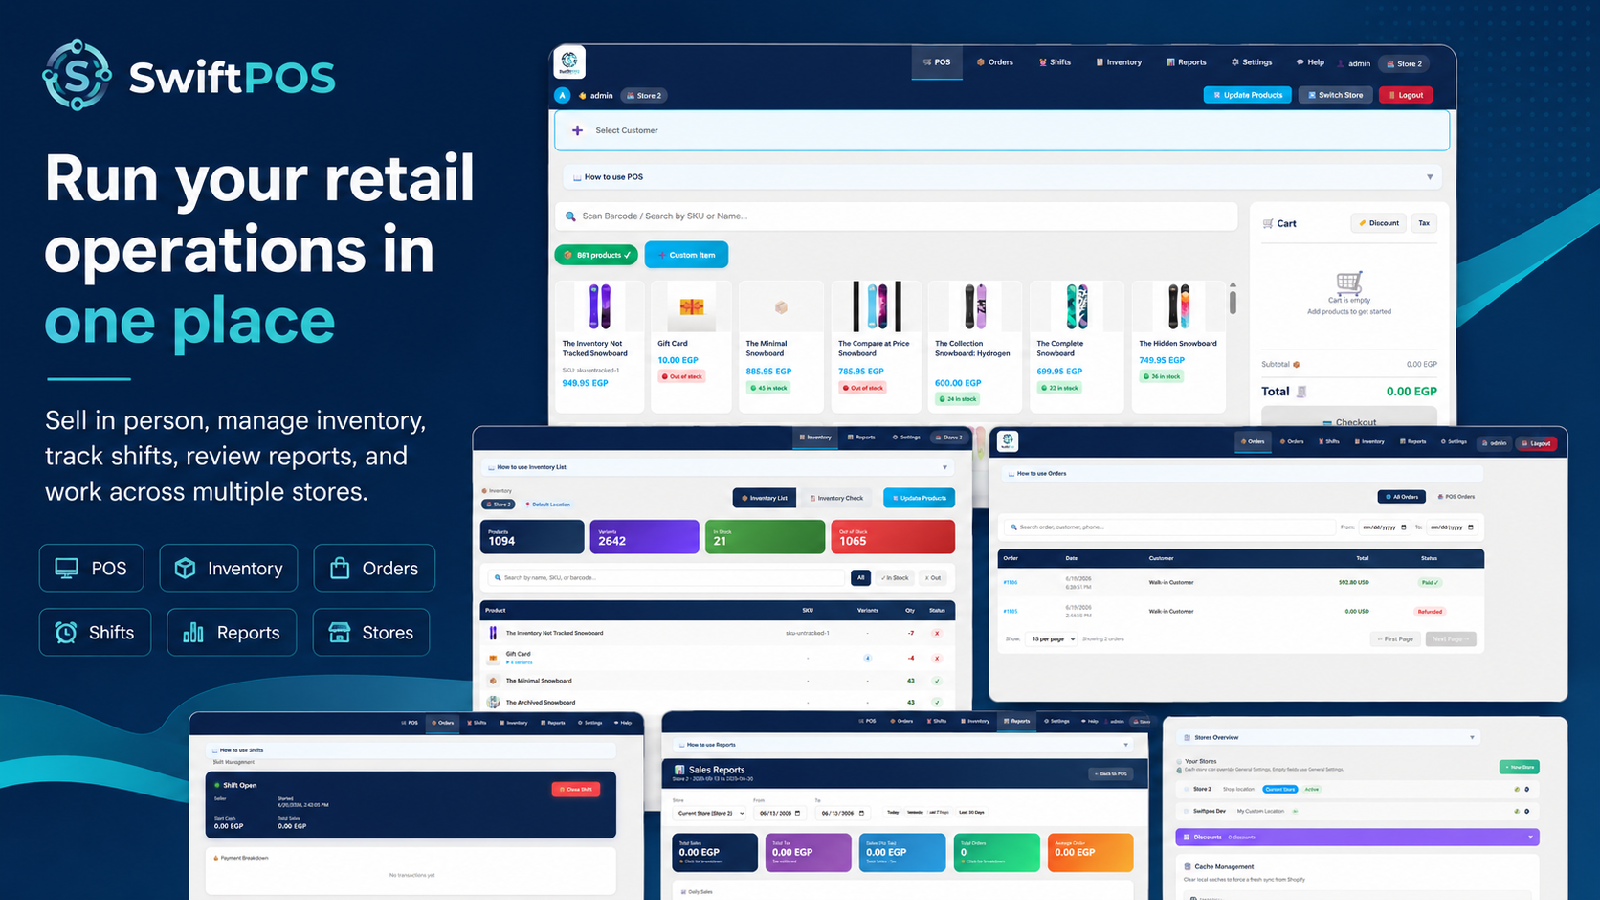
Key Areas:
- Top Navigation: Switch seamlessly between POS, Orders, Shifts, Inventory, Reports, and Settings.
- Store Selector (Pro/Enterprise): If you operate multiple physical locations, you can use the dropdown to switch between them instantly.
- Quick Stats: View today's gross sales, net sales, and total orders at a glance.
3. Opening & Closing Shifts (Growth Plan & Up)
Proper cash management starts with the Shifts module. You must open a shift before you can process cash transactions.
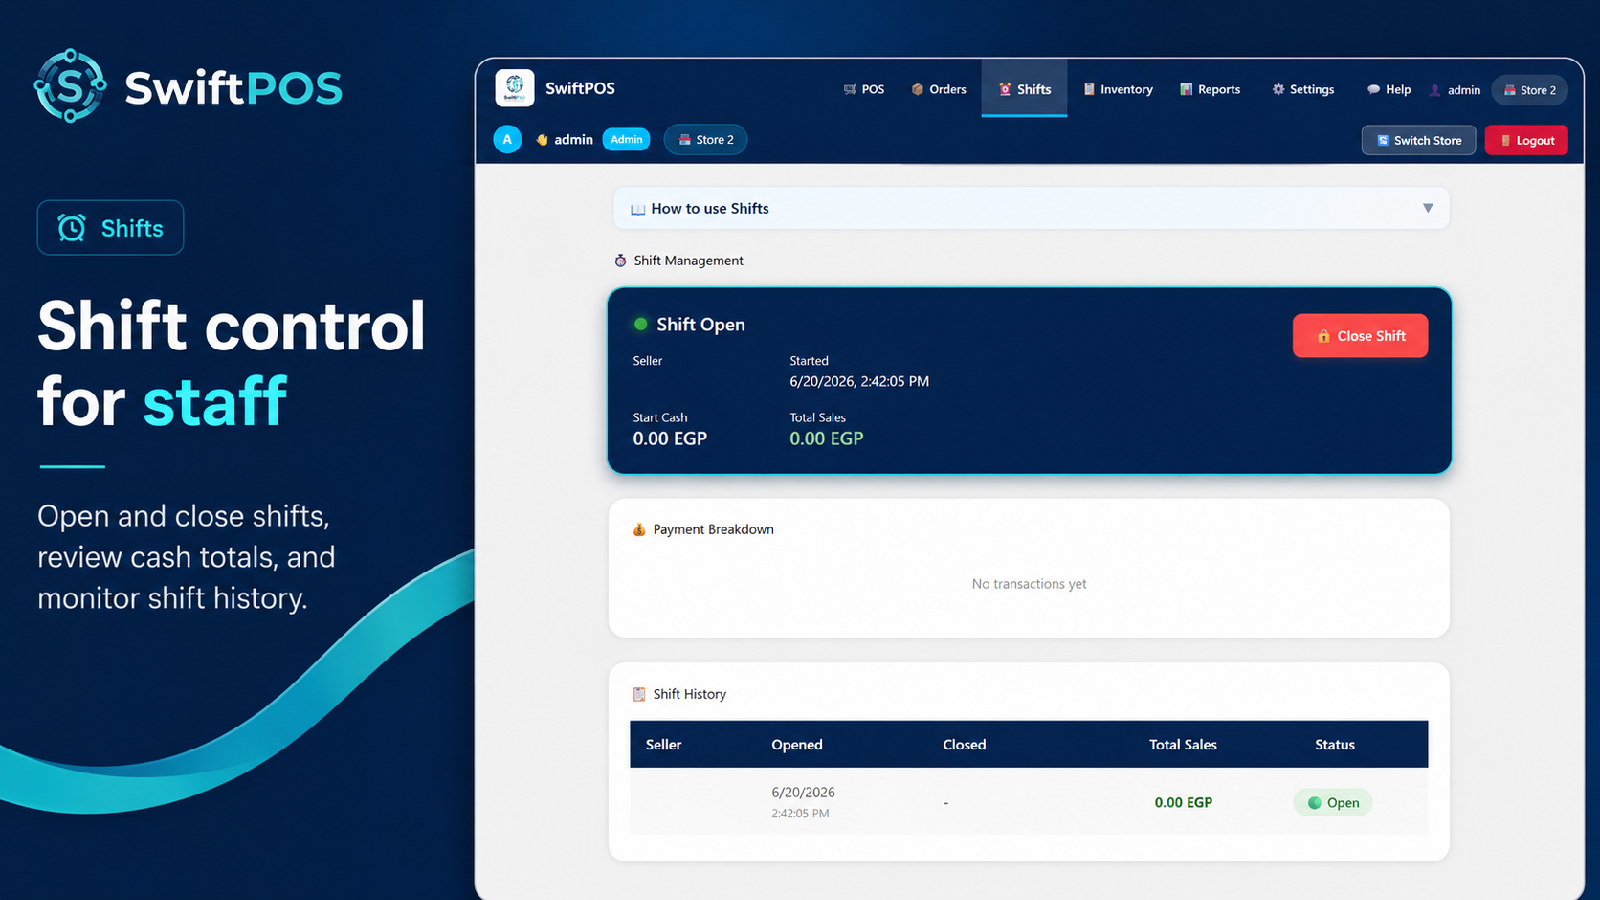
Step-by-Step Shift Flow:
- Start a Shift: Navigate to the Shifts tab and click "Start Shift".
- Enter Opening Float: Count the cash currently in your drawer and enter this as your "Opening Cash".
- Process Sales: Run your normal operations through the POS tab. All cash and card sales will be tied to this active shift.
- Close Shift: At the end of the day, return to the Shifts tab and click "Close Shift".
- Reconcile Cash: Enter the exact amount of cash in the drawer. SwiftPOS will automatically calculate your expected cash and highlight any discrepancies (Over/Short).
4. The POS Checkout Flow
The Point of Sale (POS) screen is built for speed, allowing your cashiers to process customers rapidly.
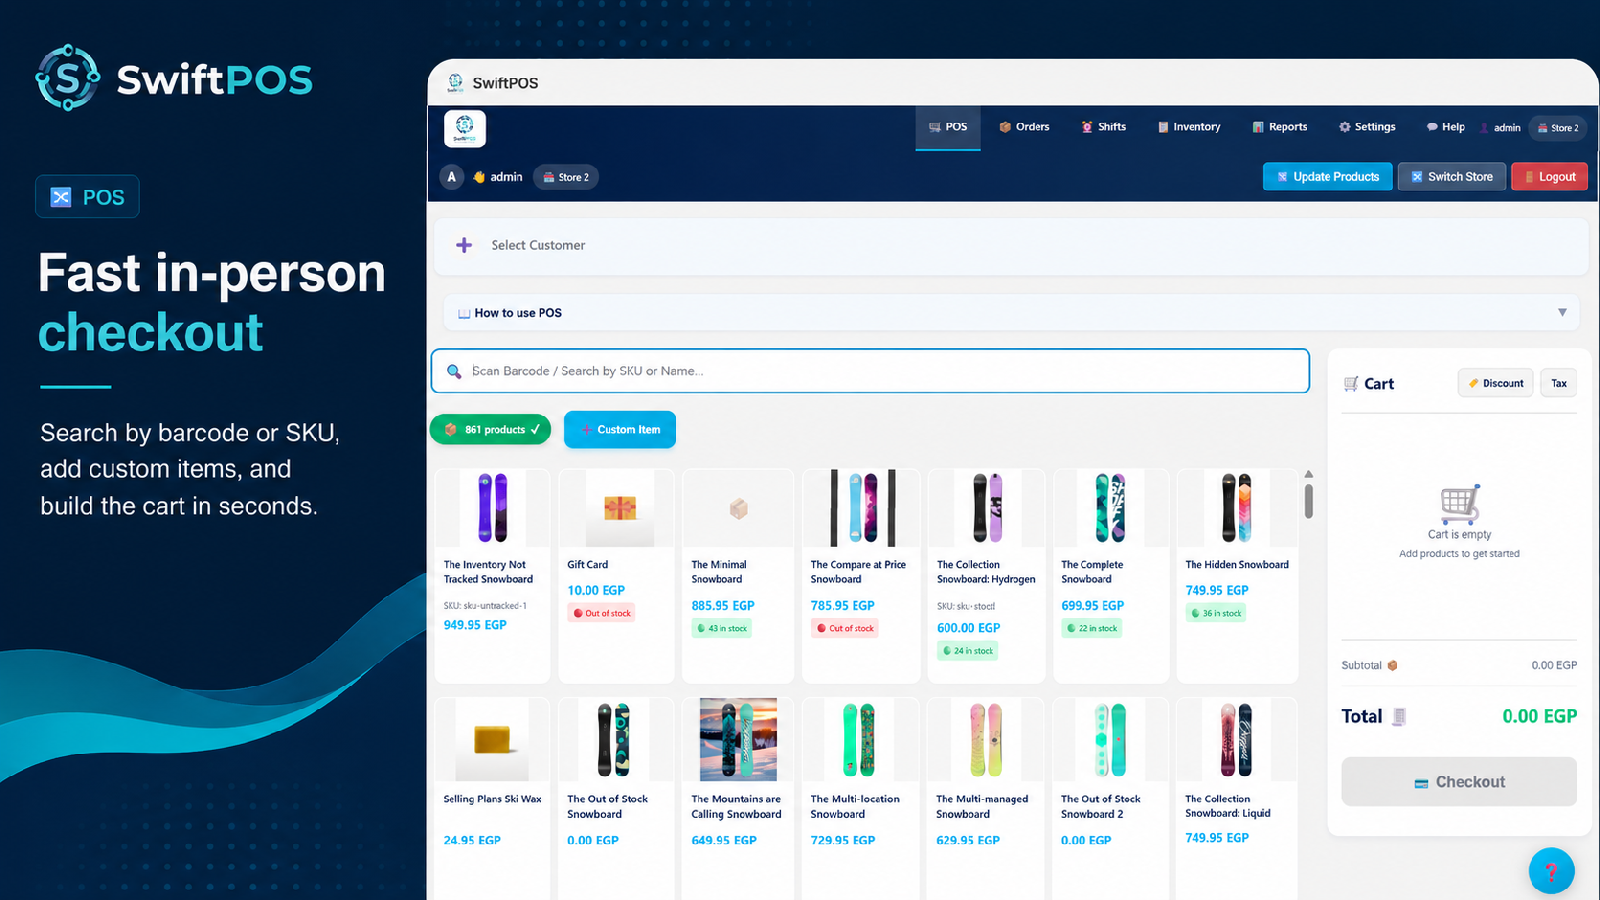
How to Process a Sale:
- Add Products: Use a connected barcode scanner, type the product name in the search bar, or tap the product cards on the screen.
- Adjust Quantities: In the cart sidebar, use the + and - buttons to adjust item quantities.
- Custom Items: Need to charge for something not in your catalog (like a special service fee)? Click "Custom Item", give it a name, and set a price.
- Apply Discounts: Tap the discount button to apply a preset percentage or fixed amount discount to the cart.
- Select Payment Method: Click Cash or Card. If cash, enter the amount tendered to calculate the customer's change.
- Print Receipt: Upon successful checkout, the receipt dialog will appear automatically.
5. Order History & Receipts
Every transaction processed in SwiftPOS is instantly synced to your Shopify Admin and stored in the local Order History.
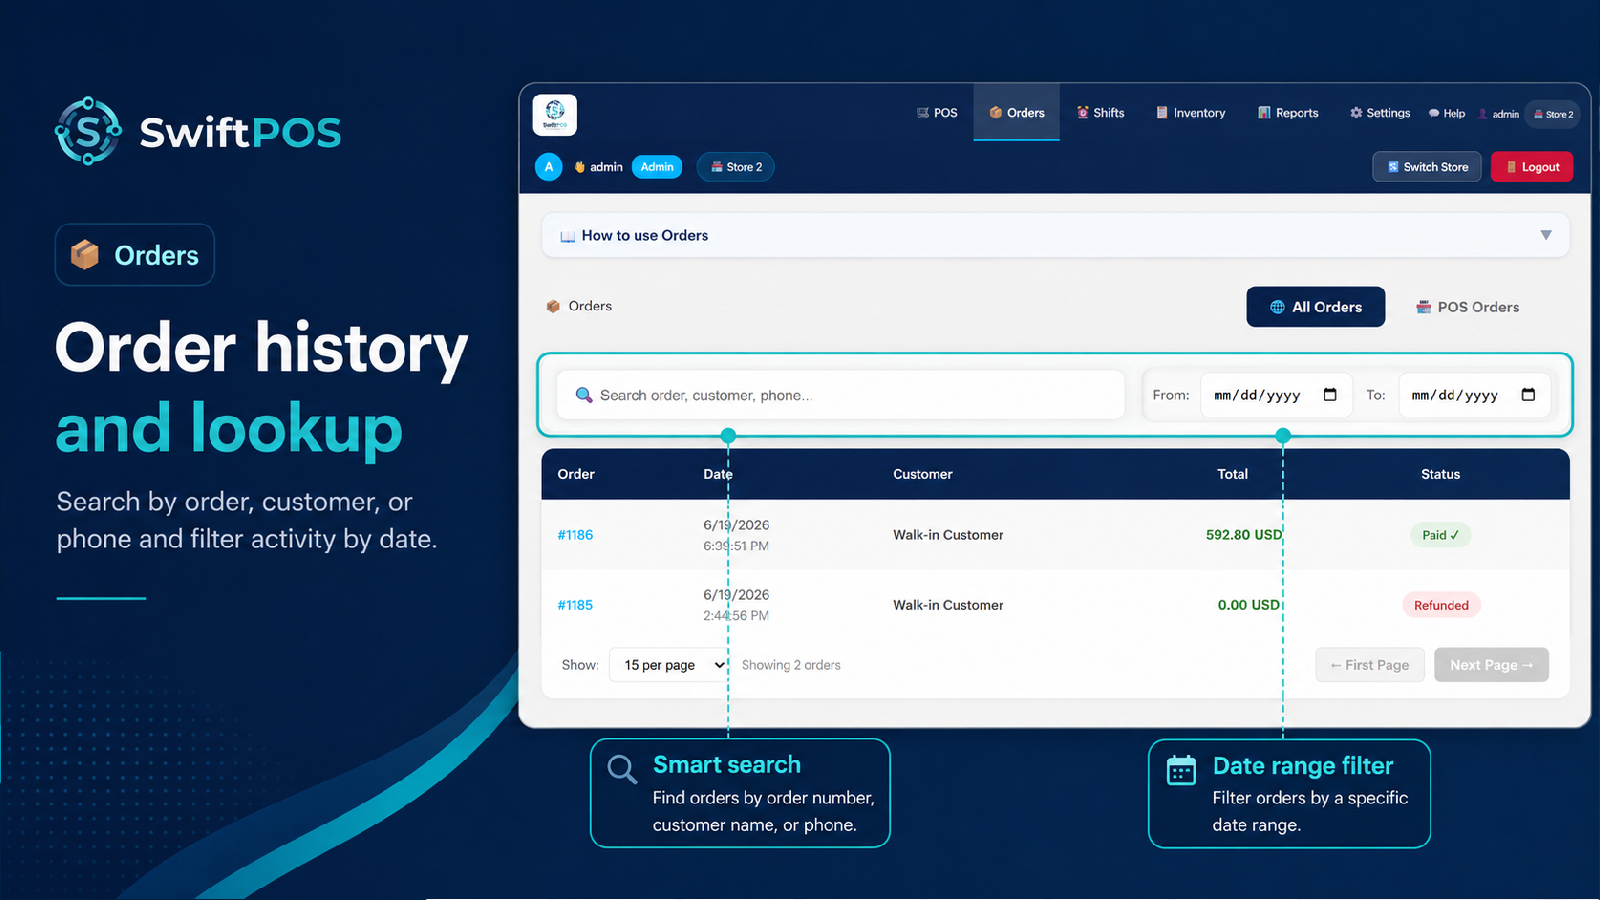
Using Order History:
- Search & Filter: Find past orders quickly by searching for the order number, customer name, or receipt ID.
- View Details: Tap any order to view the exact items purchased, the payment method used, and the cashier who processed it.
- Reprinting Receipts: Open an order and click "Print Receipt" or "Print Gift Receipt" to generate a thermal-printer-friendly receipt at any time.
6. Inventory Management (Pro Plan & Up)
Keep your physical stock levels perfectly synced with your Shopify backend without leaving the POS interface.
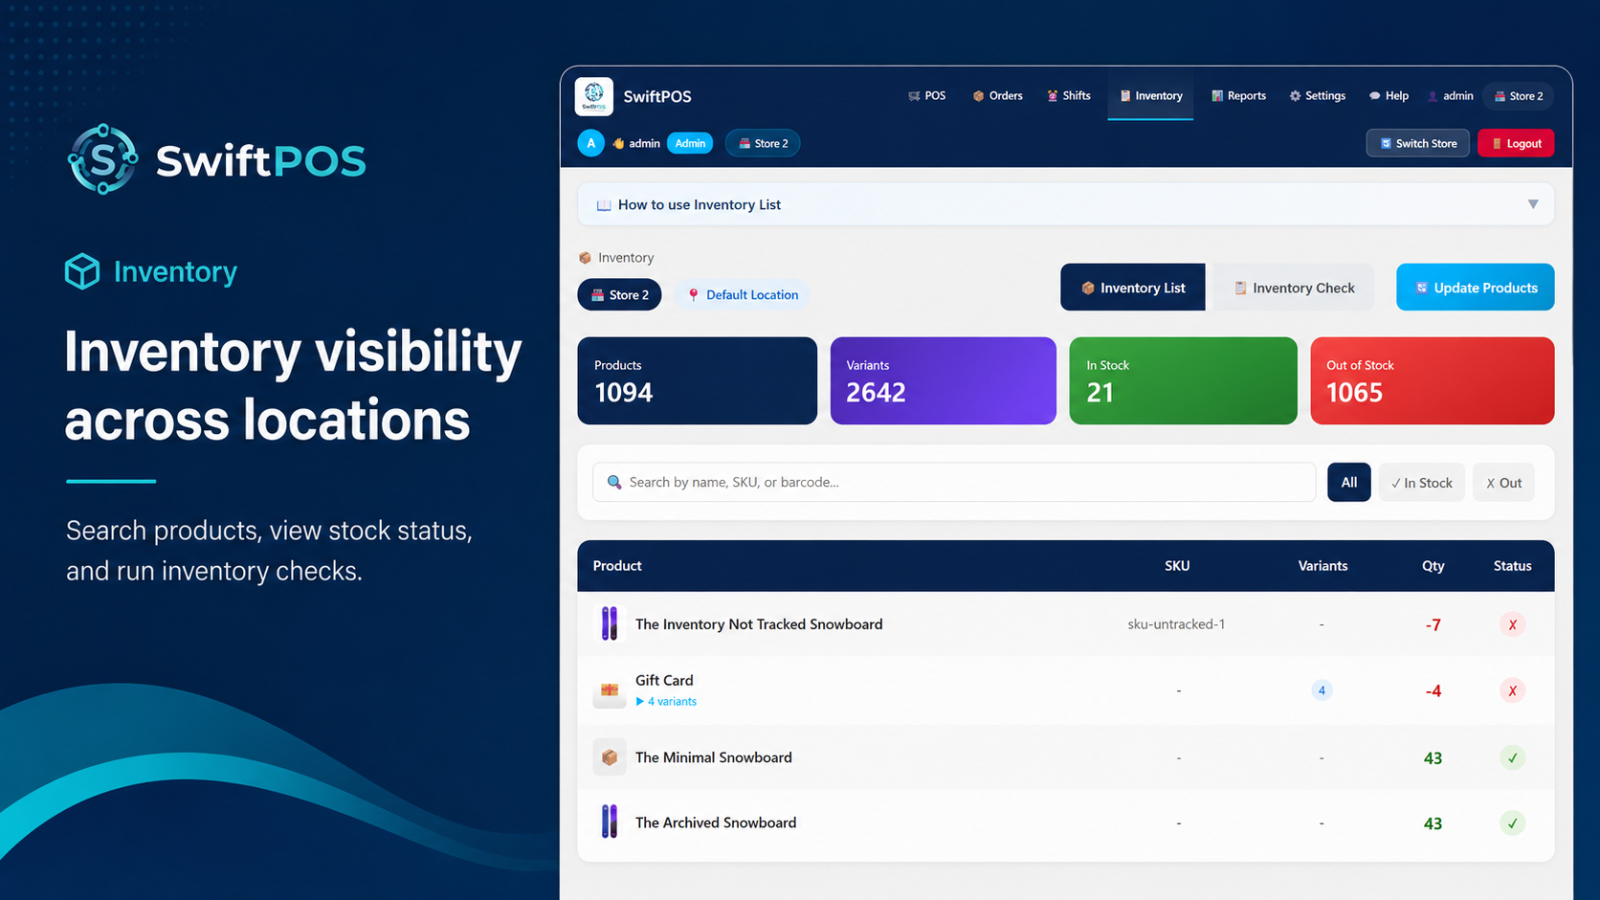
Performing a Stock Count:
- Navigate to the Inventory tab and select "Inventory Check".
- Click Start Sync Products to download your current stock levels from Shopify.
- Scan your products one by one, or search for them manually to input the counted quantity.
- Compare your Scanned Count against the Expected Count.
- When finished, click Update Shopify to push the corrected stock levels live.
7. Analytics & Reports
Understand your business performance with built-in, easy-to-read analytics.
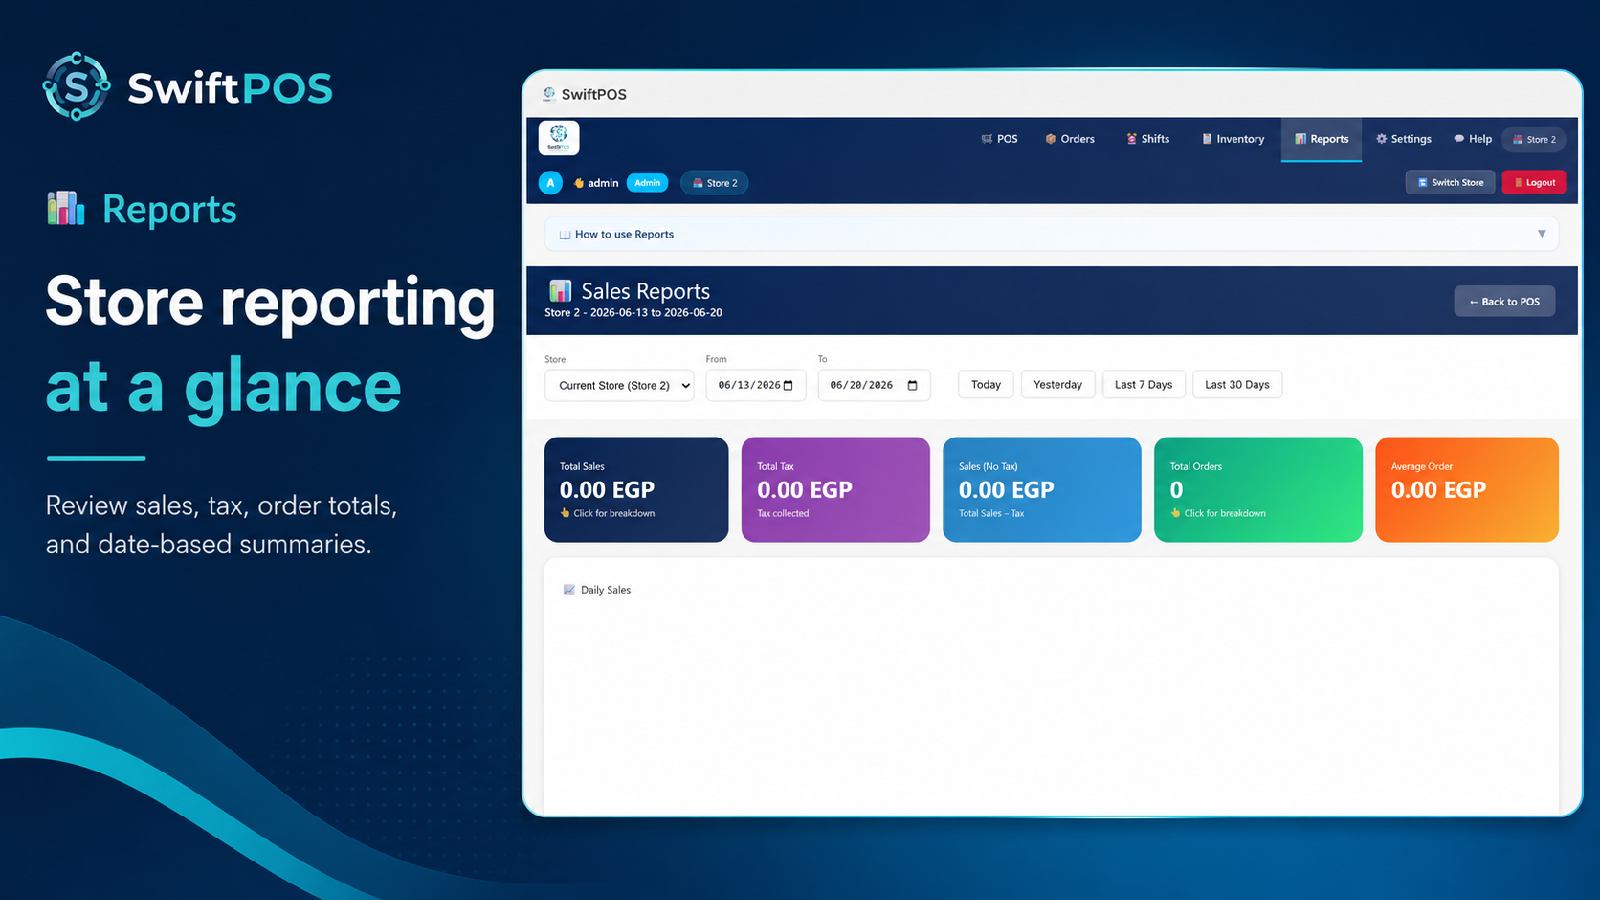
Available Insights:
- Sales Summaries: View Gross Sales, Net Sales, Discounts, and Taxes for any given period.
- Payment Breakdown: See exactly how much revenue came through Cash vs. Card.
- Advanced Filtering: Pro and Enterprise users can filter reports by custom date ranges and drill down into performance per physical location.
8. Advanced Settings & User Management
Customize the behavior of SwiftPOS to match your business workflows. (Accessible only to Admin users).
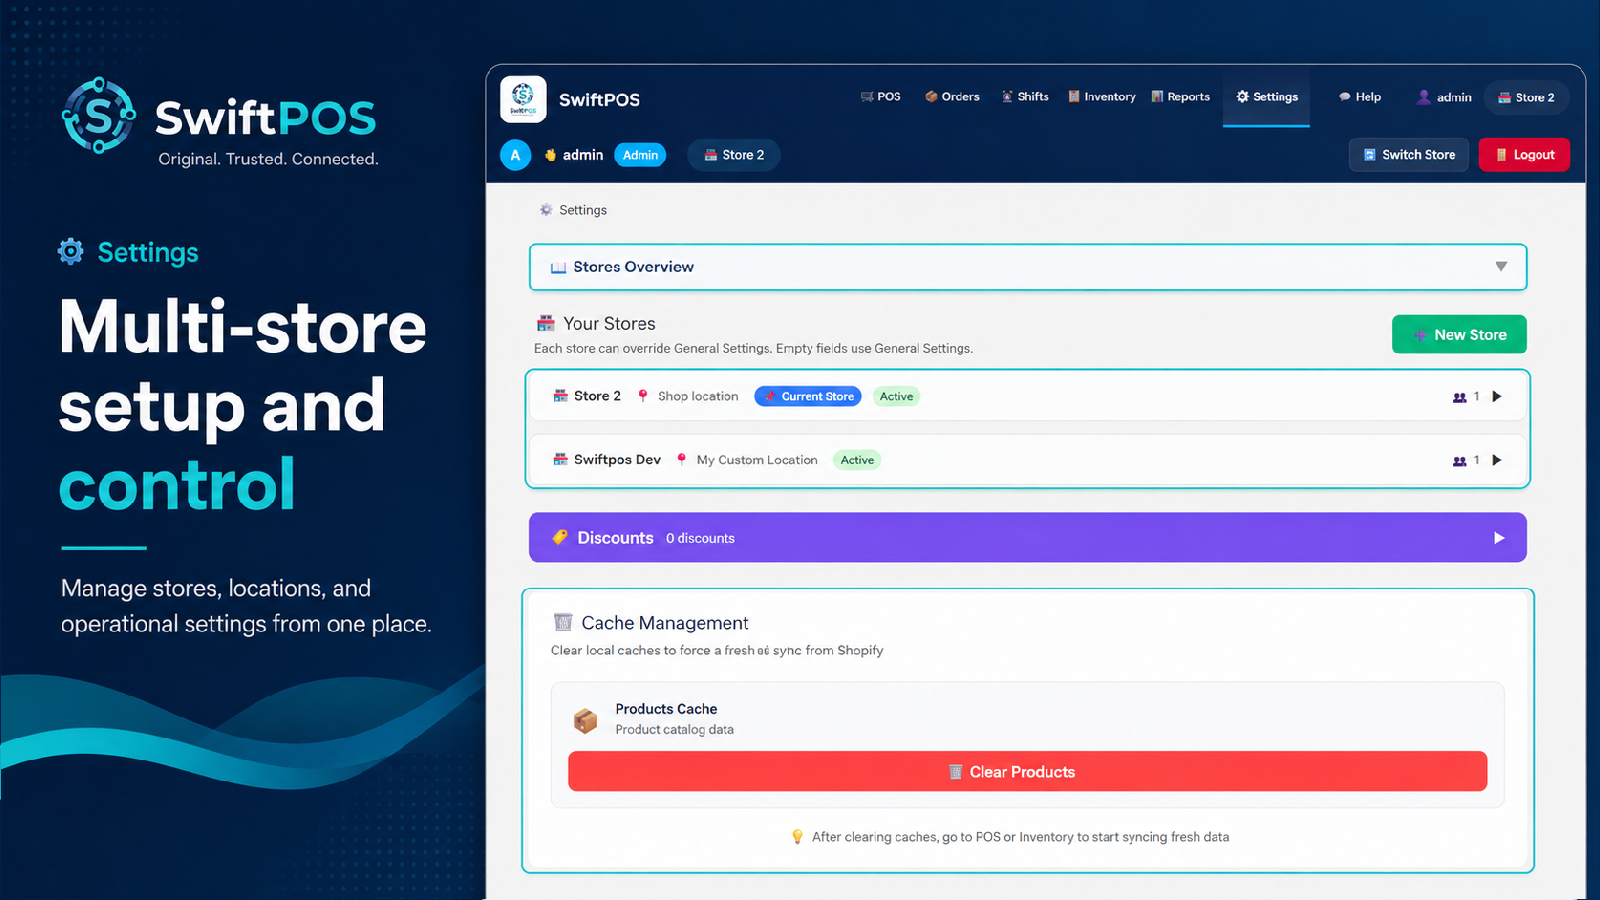
Key Configurations:
- Receipt Customization: Upload your store logo, add custom header text (like your address), and footer text (like return policies).
- User Management: Create individual accounts for your cashiers (Staff role). Staff users must log in with a PIN/Password, and you can restrict their access to specific tabs (e.g., hiding Reports or Settings).
- Discounts Setup: Create quick-access discount presets that appear on the POS checkout screen.
- Tax Settings: Configure local tax rates to be automatically applied to all POS orders.